Approve a worker
A newly registered worker encodes nothing until an administrator approves it. This article shows the review and approval, with the before and after states.
This article shows the procedure. For discovery, enrollment tokens, the wired-link requirement and troubleshooting, see Add a worker.
Start the worker#
On the machine joining the fleet, run the worker's launcher — start.bat on Windows, bash start.sh on macOS and Linux. The worker discovers the master, registers, and waits.
Review the registration#
In the web console, open Workers. The new machine appears with the status PENDING APPROVAL and its full capability manifest: operating system, CPU, RAM, GPU, hardware encoders, FFmpeg version and heartbeat.
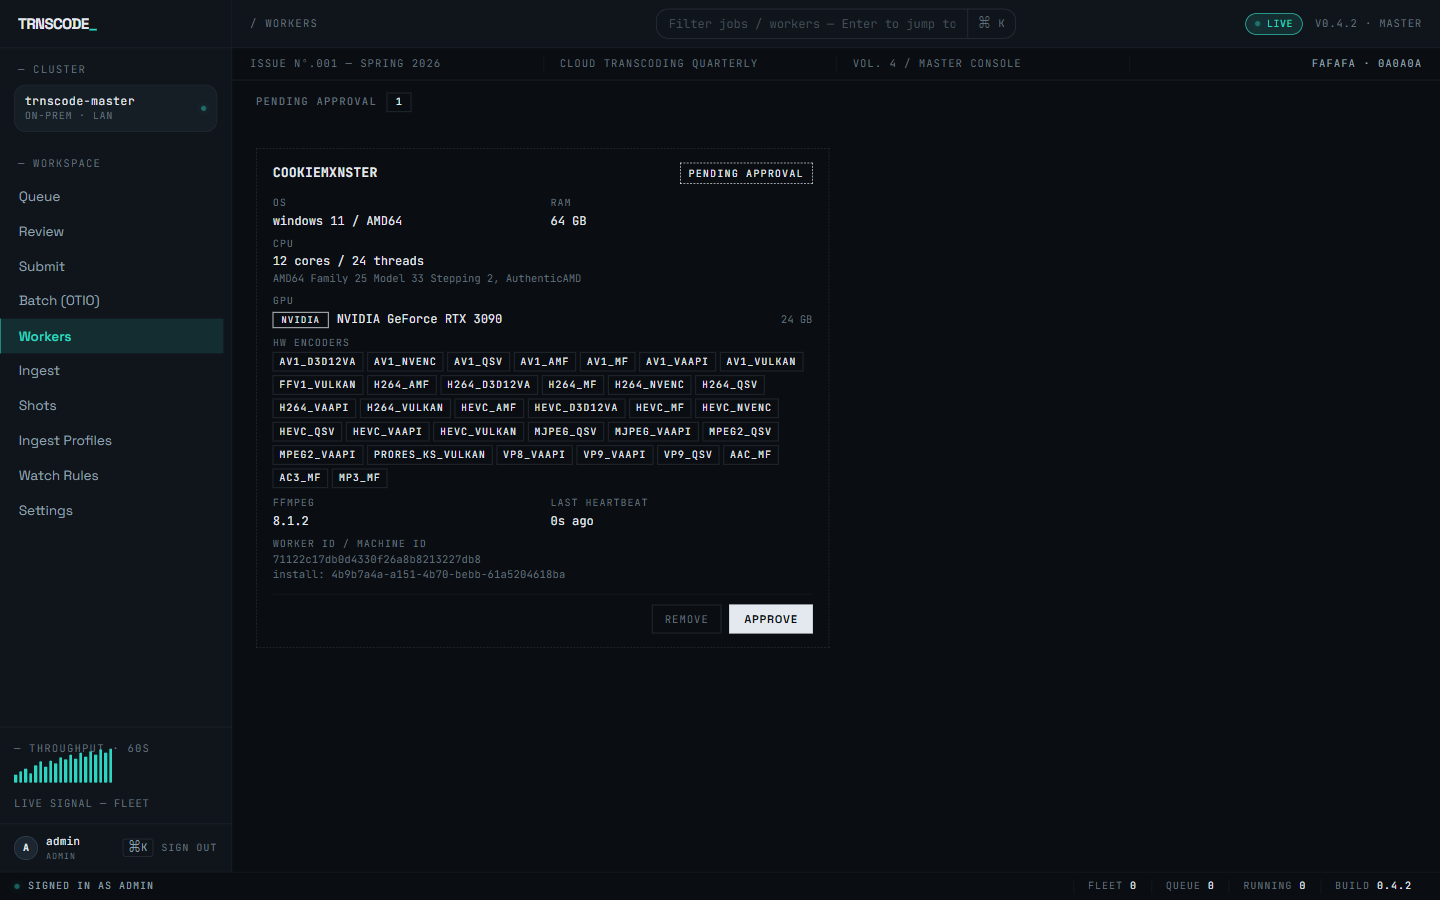
Confirm the hostname and hardware match a machine you expect. The heartbeat updates even before approval, which verifies the network path without dispatching any work.
A pending worker looks healthy from its own console — it is connected and sending heartbeats. It receives no chunks until approved. If jobs queue while a worker sits idle, check this page first.
Approve#
Click Approve. To reject a machine instead, click Remove; the worker can register again later.
Approve from a phone#
As an alternative to the Approvebutton, an administrator signed in on the phone app can approve by QR. The pending worker's card shows a QR code; on the phone, open Scan and point the camera at it. The worker is approved as soon as the code is read.
The QR code alone cannot approve — it identifies the pending registration, and the authorization is the signed-in administrator session on the phone. For installing the phone app and the scan procedure, see QR worker approval.
Confirm it is online#
The worker moves to ONLINE in the fleet list, with live resource telemetry, its FFmpeg version, and a concurrency setting. The scheduler may now assign it chunks.
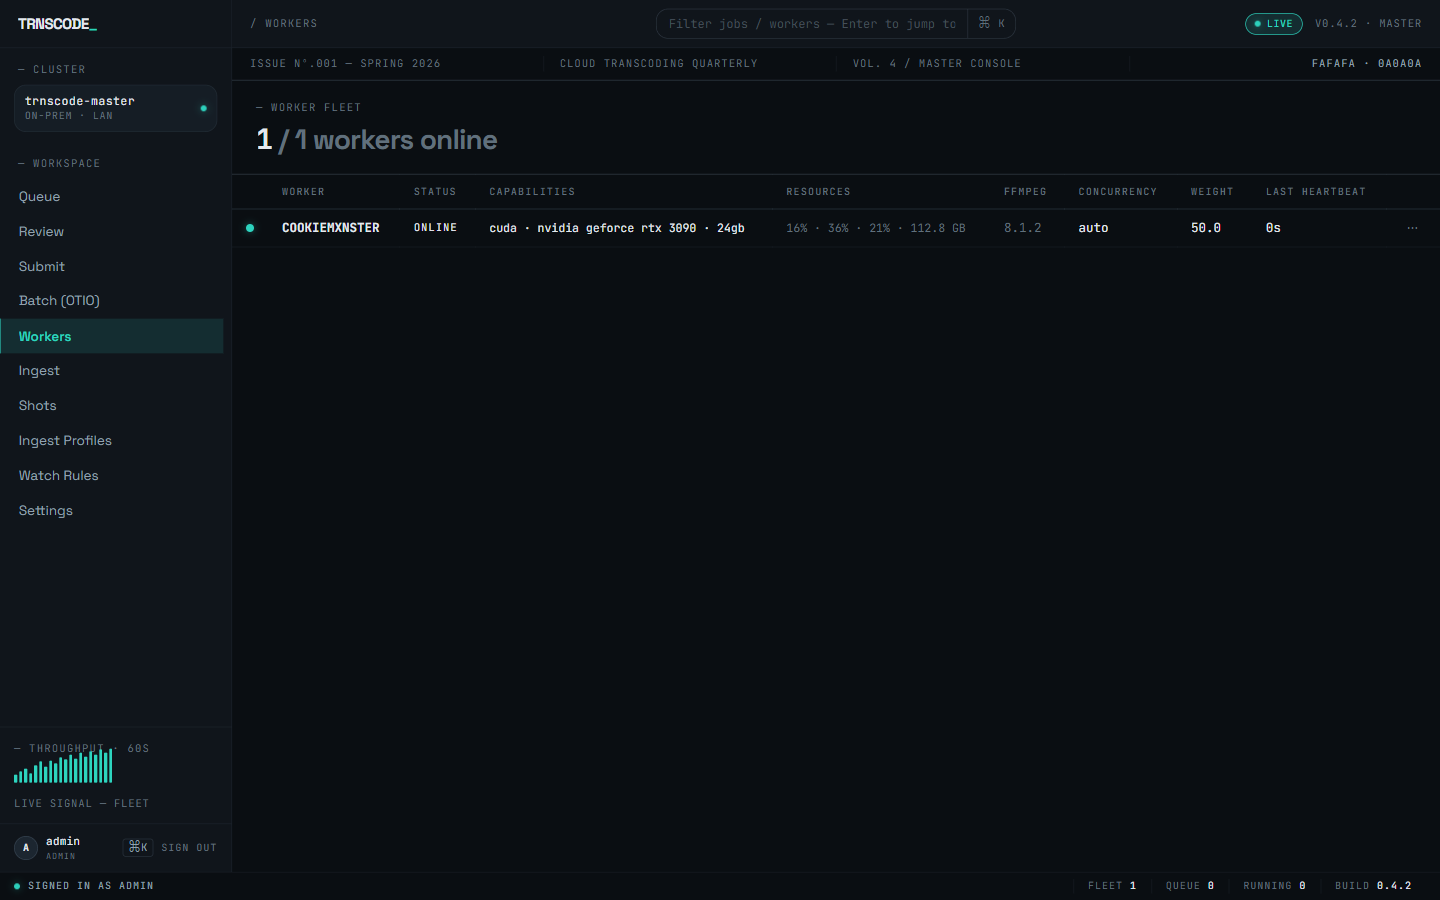
The worker is eligible for dispatch. During the next job, its colour appears in the chunk map. See Monitoring jobs.